


The Invisalign Journey
Step 1 – First visit
To see what the possibilities are with Invisalign treatment for you, we first need to 3D scan your teeth this takes about 5-8 minutes, this we load into an artificial intelligence program called the Invisalign Outcome Simulator. This program then creates a simple rotatable “before” and “after” dual-view [see below] and shows exactly what your smile could look like!
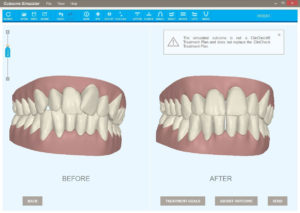
If you like what you see with the simulator and most patients do, the next step is to open a case study.
Step 2 – Case study
The aim of the case study is to gather together the necessary information to develop a full ClinCheck treatment simulation, this visit is from the patient’s point of view divided into four parts:

Examination
Your mouth and teeth will be examined and an orthodontic assessment will be made of your current dental functional and aesthetic problems to form the basis of the online technical submission to create the ClinCheck.
Digital 3D Scans
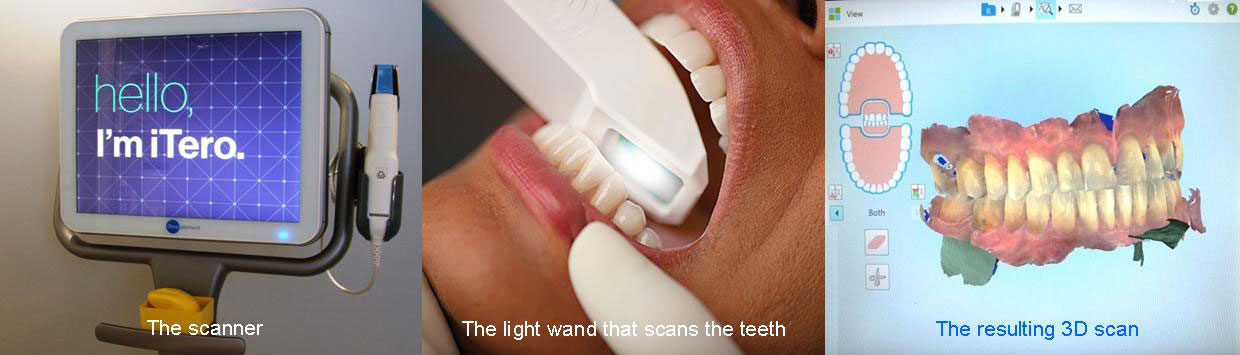
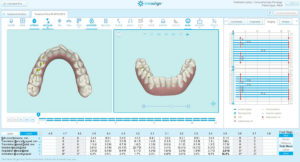
Impressions in silicone, that yucky “gloop” that runs down the back of your throat and makes you feel like vomiting are a thing of the past in this office! Instead we use a pretty state of the art, ultra-dimensionally accurate 3D scanner – this creates a STL File with which we work to create your treatment plan. Patients love the comfort and speed of scanning and for quite a few patients this removes the obstacle of impression phobia from getting in the way of their teeth being fixed.
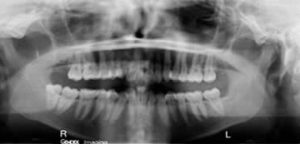
X-rays
A digital panoramic dental x-ray needs to be taken, similar to the one below. This gives us lots of necessary information like the shapes of the roots and if there are any teeth hidden under the gums.
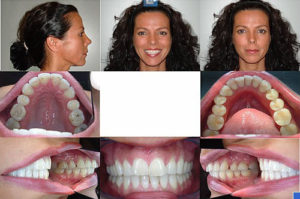
Photographs
A set of eight digital photos need to be submitted, like the ones below. This helps us with lots of things like assessing lip line esthetics, facial profile and the general condition of the teeth.
Step 3 – Treatment Planning
We then prepare a detailed treatment plan, addressing your specific dental problems and what the aims of treatment are in terms of desired final positions of teeth as well as any other esthetic and functional considerations. This report along with the 3D scans, x-rays and photos is sent via internet to Invisalign.
Step 4 – ClinCheck development
The 3D scans (STL files) are now worked on using special AUTOCAD software developed by Invisalign, this is now used to move the teeth on the virtual models into the desired positions. We then have two models “before” and “after”. The software then computes a series of sequential steps between the two models to create a video animation of the stages of treatment. We then show you the resulting “ClinCheck” to evaluate prior to committing to treatment, we are also able to share these files with you digitally, to look at again and show family and friends. This is obviously a big oversimplification but it is essentially what happens.
Step 5 – Treatment start
Then once you have given your approval to the proposed course of treatment, it then takes four days for your aligners to be custom manufactured and arrive in Italy. You are now ready to start your treatment.